

Step-by-Step Meta Business Suite Setup Guide
In today’s digital age, thousands of ads compete for users’ attention across every social platform, making it increasingly difficult for businesses to build a strong brand presence.
While many marketers consider Instagram and LinkedIn to be the two most effective platforms for marketing, one tool can help manage many of their combined tasks:
Meta Business Suite.
Approximately 96% of small businesses use Facebook and its associated ecosystem, with a significant majority managing cross-platform operations via Meta Business Suite.
Despite its strong use case, many advertisers still don’t know the basic steps to set up a Meta Business Suite account.
This blog provides a detailed, step-by-step guide to setting up Meta Business Suite.
STEP 1: Visit Meta Business Suite
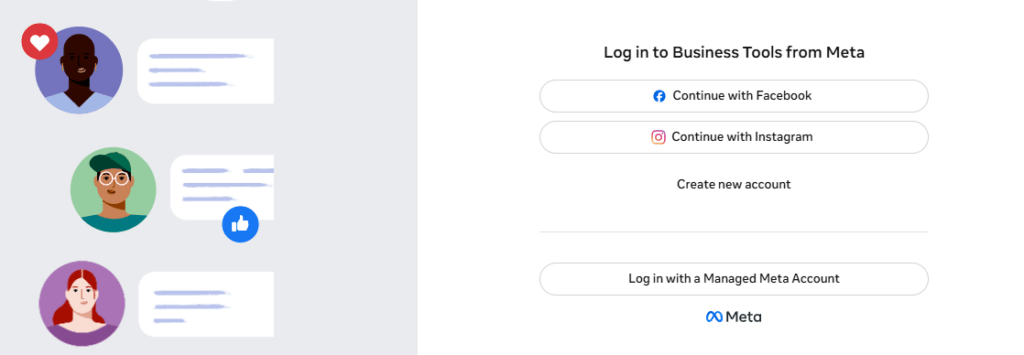
The first step is to visit https://business.facebook.com/ and Create new account if you are creating for the first time.
Or continue with Facebook or Instagram if there is an existing account.
STEP 2: Sign In Using Your Personal Account
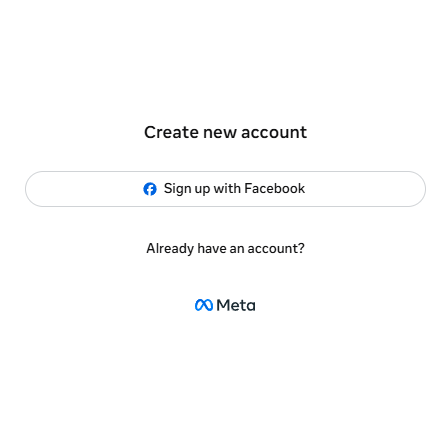
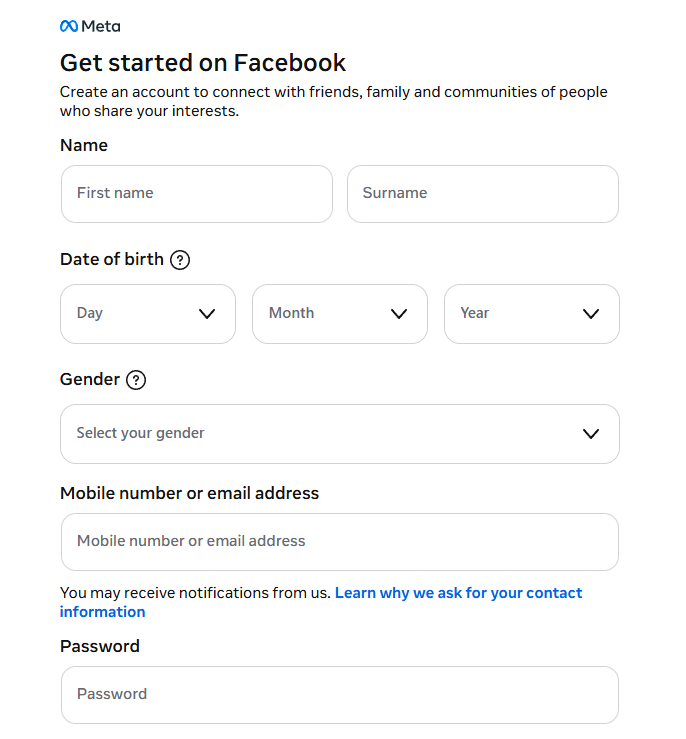
Log in using your personal Facebook account. Meta uses your personal profile only to verify your identity and does not make it visible to customers.
STEP 3: Enter Your Business Details
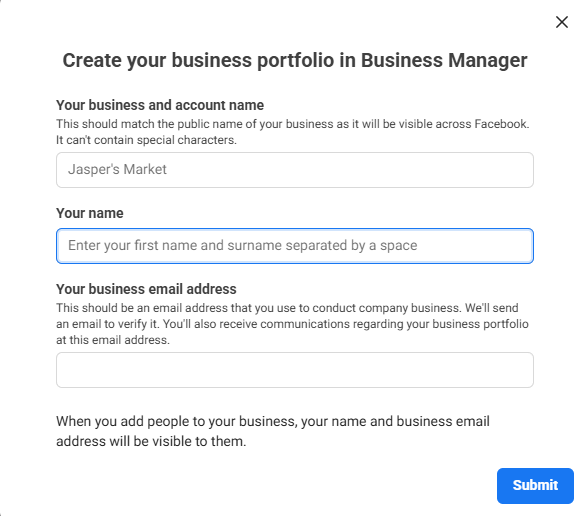
After clicking Create an Account, Meta will ask you to provide some basic information about your business.
Once you’ve entered all the required information, review it for accuracy and click Submit to proceed.
STEP 4: Add Your Facebook Page
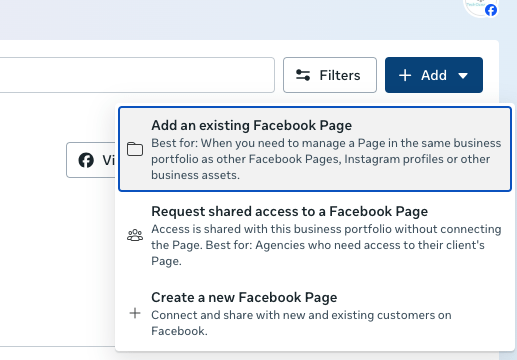
1. Log in to your Meta Business Suite account.
2. Click the Settings icon in the bottom-left corner.
3. Open Business Settings.
4. From the left sidebar, select Accounts → Pages.
5. After clicking on Add, you can:
→ Add an existing Facebook Page you own.
→ Request access to a Page owned by another business.
→ Create a new Facebook Page if you don’t have one.
Once your Page is added, you can manage posts, messages, insights, and advertisements directly from Meta Business Suite.
STEP 5: Connect Your Instagram Account (Optional)
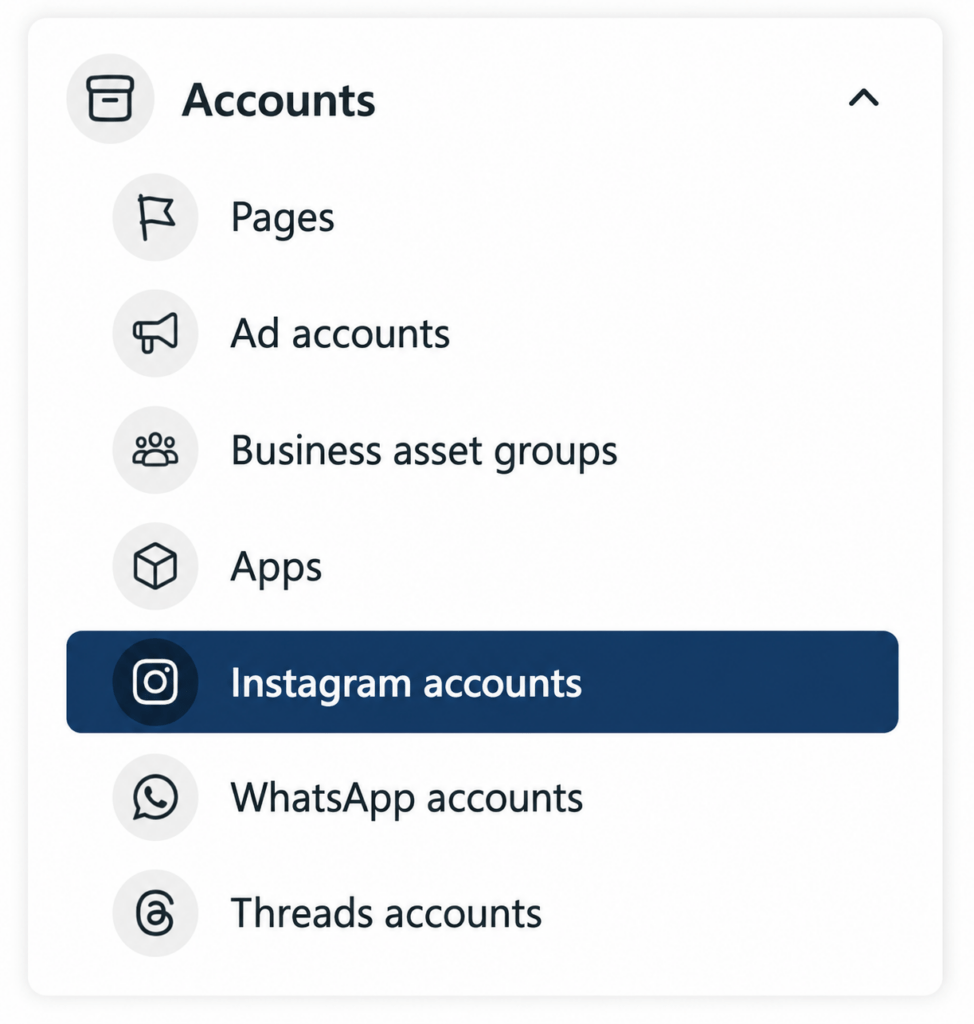
Navigate to Business Settings → Instagram Accounts and click Add.
Sign in with your Instagram Business or Creator account to manage both platforms from one dashboard.
STEP 6: Create or Add an Ad Account
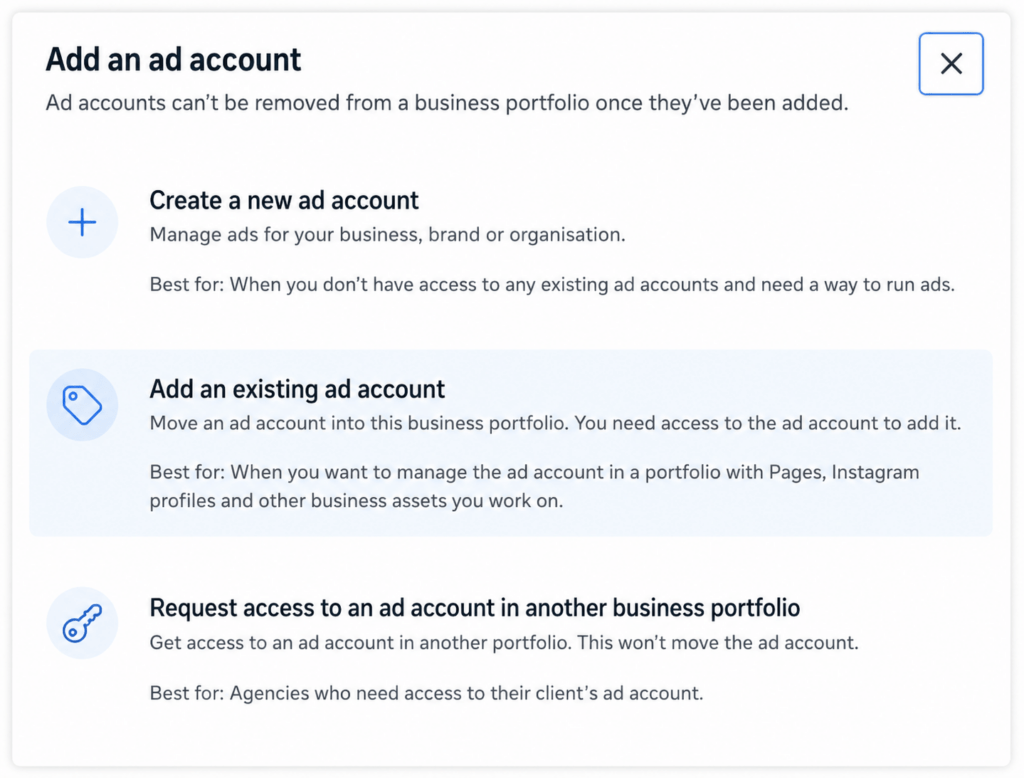
To create or add an Ad Account:
1. Log in to Meta Business Suite.
2. Click the Settings icon in the bottom-left corner.
3. Open Business Settings.
4. From the left sidebar, select Accounts → Ad Accounts.
5. Click Add.
You’ll see three options:
→ Add an Ad Account – Select this if you already own an existing Ad Account.
→ Request Access to an Ad Account – Choose this if another business owns the Ad Account and you need permission to use it.
→ Create a New Ad Account – Select this if you’re setting up a new Ad Account for your business.
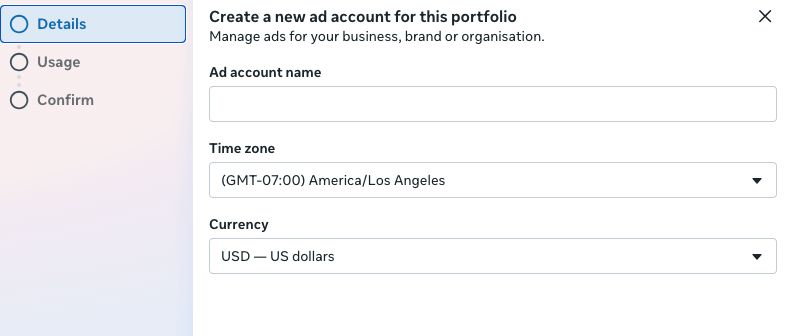
If you choose Create a New Ad Account, enter the required details such as the Ad Account Name, Time Zone, and Currency. Then assign people or team members who will manage the account and click Create.
Once the Ad Account is created or added, you can start creating advertising campaigns and managing them through Meta Business Suite.
STEP 7: Invite Team Members (Optional)
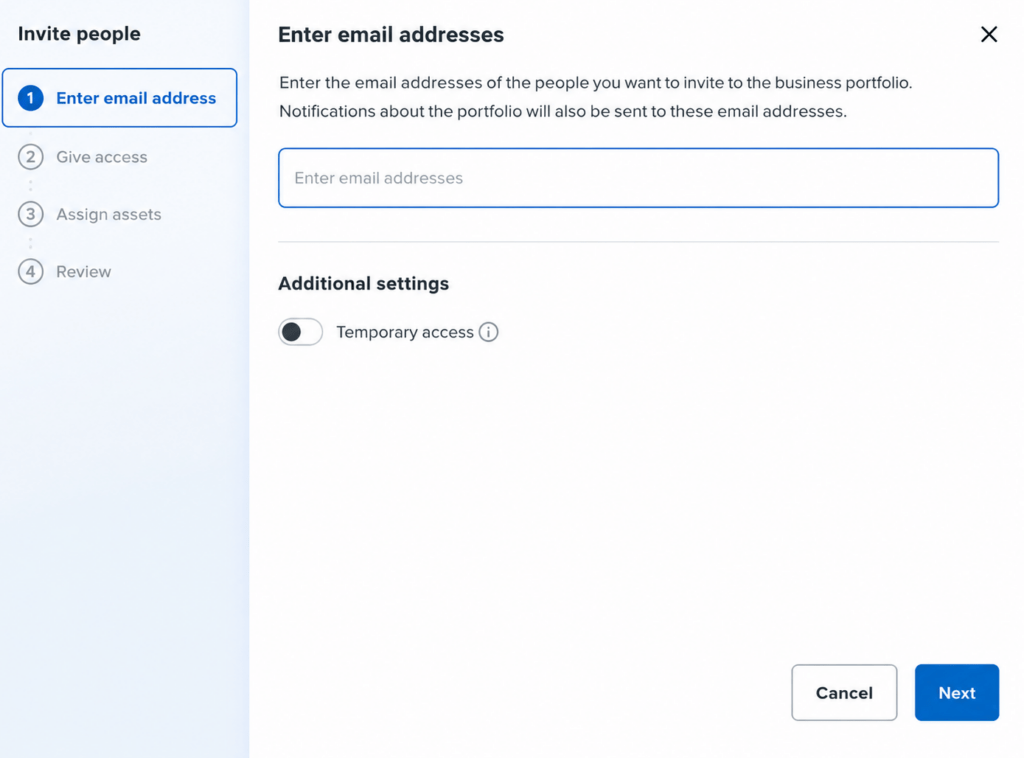
Open Business Settings → People and click Invite People.
Enter their email addresses and assign the appropriate permissions, such as Admin or Employee.
You’re Ready!
Your Meta Business Account is now set up. You can start managing your Facebook Page, Instagram account, and advertising activities from Meta Business Suite.
Setting up a Meta Business Suite account is a simple yet essential step for businesses looking to manage their online presence effectively.
By following the steps outlined in this guide, you can organize your Facebook and Instagram assets, collaborate with your team, and prepare your business for advertising and growth, all from a single platform.